Category Archives: For the home

Aquarium Backgrounds Explored

So, you are looking at setting up an aquarium. Perhaps you have already looked over the essential advice page, and now want to look at aquarium backgrounds. How can you add some pizzazz to your set up, really making it attractive? A simple, or complex, background can give the aquarium a more finished look.

A really simple aquarium background can be made from an attractive piece of cloth attached to the back of the tank. This will help hide the tubes and wires that come off the tank. Cloth is simple and inexpensive. You can get unusual printed patterns, even mimicking natural textures, or go wild with colorful designs. Being inexpensive, you can change the background easily from time to time, and keep things fresh.

If you want something that looks a bit more finished consider a pre-printed adhesive background. There is a wide variety of images you can select from, including solid colors, reef scenes, and even cartoon characters like Sponge Bob. Sometimes you get a two for one deal with a printed image on both sides that you can reverse out. For example, one side might be a tropic reef scene, and the other might be a land scene for a terrarium, like this one offered by Amazon.

Finally, for a full three-dimensional background that gives true depth and interest to your aquarium, you could by pre-fabricated backdrops made out of Styrofoam. These are really only suitable for large fish tanks, but they really give your display that museum or professional aquarium look. You can get natural looking rock walls, Amazon tree roots, and individual rocks to make your own patterns. Overhangs in the water, caves, and crevasses provide a lot of depth as well as places for the fish in your tank to hide. However, these pre-made backgrounds are not inexpensive, generally starting at $200 and quickly going up in price.

Make your own background

There is another alternative if you are on a budget but are a bit handy, and that is to make your own aquarium background. It is not as hard as it might seem. A materials list is below.

How do museums and zoos get realistic looking rocks in their displays? This same way, and you can do it too. Start with a basic plan for your aquarium set up. Consider up front where you will put hoses, pumps, and heaters so you can leave room in your design. If you have some really interesting tree branches, you may want to incorporate that into the design. Be creative.

With the design thought about, get several sheets of thick Styrofoam from your local hardware store. Cut the foam to fit the back of the tank, and then layer several pieces, like blocks, to the background to create depth and basic texture. The pieces can be stuck together with a bit of silicone caulk. Be creative in giving texture, create overhangs and ledges. Think about the basic shapes of natural stone outcrops you have seen and mimic them. You may want to make sure the bottom of the design is wide enough that the final background is stable. This first step is just your basic landform so don’t worry too much about the details yet.

After you have a rough form, begin to shape the Styrofoam to remove the edges and give it a natural look. Gently brush it with a steel wire brush to rough it up, giving it a pitted surface all over. Use a hair dryer on the foam to melt it into different shapes, but do be careful that you do not catch it on fire. Your goal is to give it a weathered shape.

Next, you will create a firm surface over your basic form. Use ready mix Quickrete from your local hardware store, mix it up and cover your form. The concrete adds to the rock look. You can use a paint brush to dab texture into the concrete as well. You will want a relatively smooth surface, but some shallow texture is good.

Let the cement cure fully, a day or two is best. Now, it is time to add color. Use paints in earth tones, or whatever you like. Make sure you use 100% latex paint. This is so the paint has fewer chemicals that might later leach into the water and harm the fish. Remember, this is not like painting a wall in your house. It is more like layering on color to give it complexity and depth. First, give the surface a basic coat, often one of the darker colors in your palette. Then, dab on lighter colors in varying patterns to add interest. Try the tips of a paint brush, a sponge, a paper towel with paint, a rag—anything you can think of, just have fun.

Let your paint cure fully, again at least a couple of days. The last step is to seal the whole thing with an epoxy resin to seal in the paint and protect it from water corrosion. Epoxy is a two-part material with a resin and a hardener. They are mixed in order to create a chemical reaction which hardens the material. A word of caution—be sure to measure the amounts of resin and hardener and follow the directions for the ratios, AND be sure to really mix the hardener into the resin before applying. The biggest source of failure for the epoxy to set up is the incorrect amount of hardener or it not being mixed evenly. It will result in your epoxy hardening in spotty patches, and some areas might not cure at all.

Give the painted concrete side a detailed covering of epoxy. Be sure to get under your ledges and in caves. Let it set up for several days. Now you are ready to put it in your aquarium. You can use silicon to tack it back to the wall, then seal around the edges with silicone caulk. It helps keep water from getting behind your rock formation.

Fill your aquarium after the caulk has fully set and circulate the water for about three days. Do a complete water change and allow it to circulate several more times. This is to help wash out any toxins that are in the paints and epoxies before you set up with fish and plants.

Now, finally, you have your own custom aquarium background. It was a bit of time, but overall should not cost your too much, and you did it yourself! Much better than something you buy.

Materials list:
Several Styrofoam sheets for base, maybe of various thicknesses
Silicone caulk
Wire brushes
Hair dryer
Knives and other tools for shaping
Ready mix Quickrete
Paint, 100% latex in a variety of colors (3-4)
Brushes, sponges, rags, paper towels, for painting
Epoxy for sealing the surface

Other posts:
Aquarium stands, options and considerations
Wall aquariums and wall-mounted aquariums
Aquarium hoods
Aquarium Stands, What Are the Options and Considerations?

So, you have decided to set up a home aquarium. But there is so much to consider before “diving” in. You can find many suggestions at the essential advice page. Here, we are going to focus on your aquarium stand.

When you first start out, you may only have a small aquarium that you set on some pre-existing piece of furniture. This can work fine, but there are several cautions. Aquaria need a lot of supporting equipment, such as fish food, nets, testing kits, and such. And there can be a lot of hoses and wires running to the tank for filters, heaters, and lights. It is not long before you might wish for a system to contain all this stuff. Not to mention, there are always little bits of water that splash out of the tank, say when filling it or cleaning, and you do not want that water getting on nice furniture. It can easily get under the tank and cause a lot of damage while going unnoticed.

The cure for this is a dedicated aquarium stand. There are several common styles you can buy, and like many other things, the nicer they are the more expensive they tend to be.

Regardless of which stand you end of going with, keep a couple of things in mind. First, the stand should be set up level. If the stand is off level, the water in the tank will sit unevenly in the aquarium. Aside from maybe looking a bit funny, the uneven water pressure could cause your tank to crack and break. Secondly, remember that when your tank is full of water it will be very heavy. Water weighs from 8 to 8.5 pounds per gallon, which means a large 55 gallon aquarium can weigh in at 470 pounds. Plus, you then add fish, pumps, rocks or aquarium gravel, and you soon have a very heavy house-hold component.

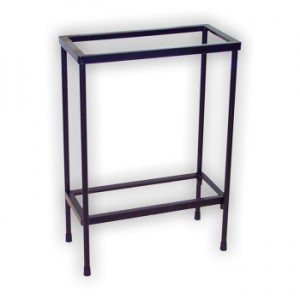
The most basic stand is a simple welded iron affair, often made out of painted angle iron. They tend to be the least expensive style, are sturdy and very functional. However, they are not particularly attractive. Prices range from $20 – $60 depending upon the size. You could drape this stand with a material cover to make it a bit more attractive.

Basic metal aquarium stand

Basic metal aquarium stand.

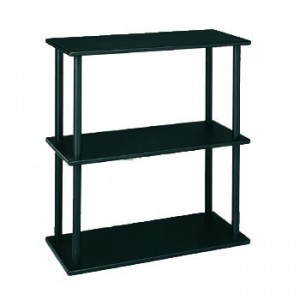
You can buy special open shelving systems designed for aquaria. Usually, the top shelf is sized correctly for the size of aquarium you have, and there are open shelves below to store your equipment. This style of stand is less “industrial” looking than a simple welded stand. They range in price from about $60 – $150.

Open shelving style aquarium stand

Open shelving style aquarium stand

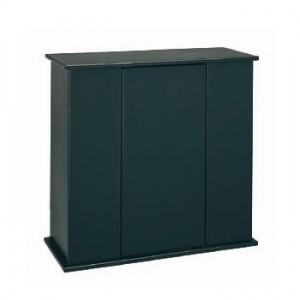
Moving up the “niceness” scale would be a closed cabinet, made out of compressed fiber board and often powder coated to make it more water resistant. This style is really just an enclosed version of the open shelf style, but it can be nice to close the doors on the equipment and supplies stored on the shelving. Prices generally start around $120 for this type.

Fiber board cabinet-style aquarium stand

Fiber board cabinet-style aquarium stand.

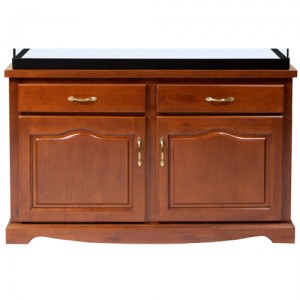
Like any kind of cabinetry, you can get really nice cabinets made out of hard wood and finished with a nice finish. Understandably, the price is much higher, but they look really nice too. You can often get a matching top as well, that sits over the top of the tank and covers the hood and light system, giving a neat, finished look. These nicer cabinets start at $200 and go up from there depending upon size.

Nice wooden cabinet aquarium stand

Nice wooden cabinet aquarium stand.

You could consider making your own aquarium stand if you have any carpentry skills. A simple closed cabinet style with simple doors would not be hard to make. Just remember to frame it with plenty of vertical supports to hold the tank weight, at least one support in front and back for every 24 inches of aquarium length. Also, use at least a ¾ inch plywood for the top.

A nice aquarium stand is a critical part of your aquarium set up, so give it some forethought, and get the best system you can.

Related Posts:
Aquarium hoods
Essential advice for starting a home aquarium
Aquarium backgrounds explored

What to Look for in Tree Services

Most people enjoy the trees on their property. Unfortunately, trees can cause problems  like everything else. The good news is, its easy to protect your safety by hiring a quality tree services to deal with your trees.

These professionals can do all kinds of things, from cosmetic trimming, pruning, and if necessary the removal of a whole tree. Some companies are better than others. You could just go with the first choice you find, but you’re more likely to get the best when you look at different options. Different service companies have different qualifications and practices. Here is what you need to take into account.

Warning Signs

You should always investigate a company before you hire them. Dealing with trees requires a lot of responsibility. Stay away from unprofessional businesses or people, such as the local neighborhood handyman. A company that knows what its doing will examine your property and give you a free price estimate of the service before you hire them. If they want you to pay without providing this, grab your wallet and run in the opposite direction!

Trained Employees

Working high up with trees requires a lot of training to do right. In many areas, tree service employees need to go through a training program and be licensed. This generally requires many hours of both experience (with an apprenticeship) and classroom time. Make sure the company has licensed employees.

Legal Concerns

You do not want to be held liable if the company you trusted your trees to made a mistake that caused your old pine to fall on the neighbor’s house. If a company is legitimate, they will have liability insurance. This is way of saying “trust us, we know what we’re doing, and will take full responsibility for doing it right”. A good choice should have at least $1,000,000 of liability insurance. Workers compensation is a similar issue.

Without a good compensation program, an employee who injured himself working on your property might be inclined to hit you with a lawsuit! So make sure that the company also has compensation for injured employees.

Examine Multiple Options

To be sure you receive the quality if service you deserve, make sure to look at multiple options. Find at least three local companies that meet all these standards, and compare the prices. See how satisfied previous customers have been by searching for reviews on the internet.

Most of us would rather avoid thinking about the worst case tree scenario, but accidents do happen, so you need to be prepared for the possibility. Its better to take care of potential dangers now, than when they fall through your roof at 12:00 AM. There are plenty of companies out there who do know what they are doing. So as long as you do your homework, everything will turn out fine.

For more great information about all sorts of nature topics, you can check out The Nature Walk. Whether it be fast growing trees, lawn turf, or plant stands, we can tell you about it!

Advice on Installing Travertine Tiles

Tiles come in a wide variety of materials. No matter what material is chosen, installation has these basic steps. One of the first requirements is a solid and firm base. A mastic or mud bed is spread on the firm base to hold the tile in place. The tiles are then laid on the mud to form the desired pattern. The mud is allowed to dry before a grout is spread to fill the spaces between the tiles. A sealer is applied to the entire area to prevent discoloration of the grout and the tile.
The above statements apply to all forms of tiles. Installing travertine follows the regular rules plus a few that are specific to a natural stone and a veined material.

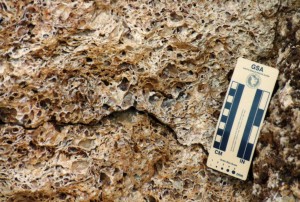
One of the considerations when working with travertine tile is the veining of the stone. A commonly used method of shaping man-made tiles is by using a “score and snap device”. This method does not work with travertine. The natural travertine is porous, and may have those pores filled with a special mixture of cement and epoxy. The combination of the stone and filler gives the tile an irregular density that requires a power tool to cut the tile. The veins that run through the travertine add another complication for the installer. The veins are a natural “weakness” lines in the stone. Cuts can be made across the veins, but experience working with travertine will help guide a installer to prevent unwanted breaks both at the time of setting and later.

Black Rock travertine

Black Rock travertine

The tiles are cut from natural stone. The stone will vary from quarry to quarry and cutting results in some irregularities in the thickness and shape of the tiles. Most of the irregularities can be adjusted by the way the tile is laid. Again, an experienced tile setter will adjust the mud bed to compensate for variation in thickness, and can position the tiles to conceal the size differences.

Because the stone is a natural product and no two tiles will be the same, the coloration in the stone will vary a great deal. Some of the tiles will have many veins and others little or none. It is highly recommended that you open and inspect all the boxes of tiles to allow the installer and the homeowner to view the stone and lay out a pattern that is most pleasing. This will also allow the installer to select the best tiles to cut before the job is started. This could save time and money because fewer tiles are ruined. In many cases laying out the whole area will be well worth the time.

Most installers feel that sealing the tile is a must. Sealing the stone is a simple way to assure the tile will remain beautiful. Re-sealing the tile every few years is also recommended. The routine care and maintenance is best done with clear water.

Mild soaps can be used but harsh cleaners and acids should never be used. The calcium carbonate of the travertine will react with even weak acids and dissolve. This will cause the stone to etch and could cause significant and irreversible damage. If you are uncertain you can test any cleaner on a sample tile reserved for that purpose before you use anything on the installed tiles.

Related posts:
Introduction to Travertine Tiles
Unusual Occurrence of a Fossil in Travertine

The 3 Tech Breakthroughs That Changed Garden Lighting for Good

In the last few years, there has been a real spike in the popularity of solar garden lights.  There are many reasons for this.  They are simple to install, are comparable to traditional garden lights with recent increases in technology, AND they save you copious amounts of money off your power bills.

People like the fact that there is no wiring that you have to navigate through during installation.  Until recently, this type of light was not in the same ballpark as others that required wiring installation.  The lighting was less bright, the batteries didn’t last long enough, nor did the solar panels transform enough of the sun’s light to last very long after dark, so they just didn’t really justify purchasing this type of garden lighting.

In the last 5 years, there have been a number of technological breakthroughs which have made solar lighting much more efficient, and yet still cost effective.

The first was LED technology.  These greatly increased the brightness of any garden light, while using a lesser amount of power, which obviously plays right into the hand of any solar technology which needs to store power, as it lasts for longer.  It also moves them into direct competition as your regular outdoor lighting.

The second technological advance was in power storage.  Batteries which these lights use to store the power they receive from the sun have become much more cost effective, while becoming more functional.  Once the batteries are fully charged, they are able to last longer until they need recharging, and can handle more charges.

The third breakthrough is in the solar panels.  These have become much better at photosynthesizing the light (turning it into power), and the panels themselves have become much more competitive price-wise.

When you add these three factors up, you can see why solar lighting is now making significant inroads into the outdoor lighting market, as it is now a product that has comparable quality to normal lighting, and will actually pay you back for as long as you have them on your property.

There are many other interesting facts on Boneblogger. Look around.