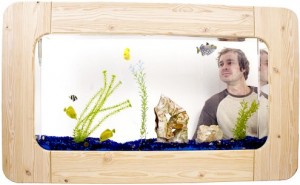
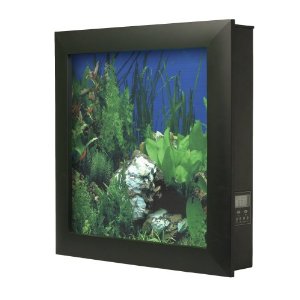
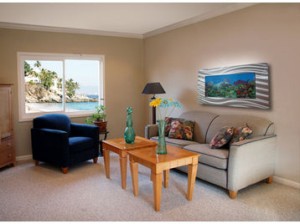
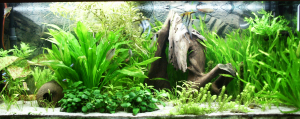
So, you are looking at setting up an aquarium. Perhaps you have already looked over the essential advice page, and now want to look at aquarium backgrounds. How can you add some pizzazz to your set up, really making it attractive? A simple, or complex, background can give the aquarium a more finished look.
A really simple aquarium background can be made from an attractive piece of cloth attached to the back of the tank. This will help hide the tubes and wires that come off the tank. Cloth is simple and inexpensive. You can get unusual printed patterns, even mimicking natural textures, or go wild with colorful designs. Being inexpensive, you can change the background easily from time to time, and keep things fresh.
If you want something that looks a bit more finished consider a pre-printed adhesive background. There is a wide variety of images you can select from, including solid colors, reef scenes, and even cartoon characters like Sponge Bob. Sometimes you get a two for one deal with a printed image on both sides that you can reverse out. For example, one side might be a tropic reef scene, and the other might be a land scene for a terrarium, like this one offered by Amazon.
Finally, for a full three-dimensional background that gives true depth and interest to your aquarium, you could by pre-fabricated backdrops made out of Styrofoam. These are really only suitable for large fish tanks, but they really give your display that museum or professional aquarium look. You can get natural looking rock walls, Amazon tree roots, and individual rocks to make your own patterns. Overhangs in the water, caves, and crevasses provide a lot of depth as well as places for the fish in your tank to hide. However, these pre-made backgrounds are not inexpensive, generally starting at $200 and quickly going up in price.
Make your own background
There is another alternative if you are on a budget but are a bit handy, and that is to make your own aquarium background. It is not as hard as it might seem. A materials list is below.
How do museums and zoos get realistic looking rocks in their displays? This same way, and you can do it too. Start with a basic plan for your aquarium set up. Consider up front where you will put hoses, pumps, and heaters so you can leave room in your design. If you have some really interesting tree branches, you may want to incorporate that into the design. Be creative.
With the design thought about, get several sheets of thick Styrofoam from your local hardware store. Cut the foam to fit the back of the tank, and then layer several pieces, like blocks, to the background to create depth and basic texture. The pieces can be stuck together with a bit of silicone caulk. Be creative in giving texture, create overhangs and ledges. Think about the basic shapes of natural stone outcrops you have seen and mimic them. You may want to make sure the bottom of the design is wide enough that the final background is stable. This first step is just your basic landform so don’t worry too much about the details yet.
After you have a rough form, begin to shape the Styrofoam to remove the edges and give it a natural look. Gently brush it with a steel wire brush to rough it up, giving it a pitted surface all over. Use a hair dryer on the foam to melt it into different shapes, but do be careful that you do not catch it on fire. Your goal is to give it a weathered shape.
Next, you will create a firm surface over your basic form. Use ready mix Quickrete from your local hardware store, mix it up and cover your form. The concrete adds to the rock look. You can use a paint brush to dab texture into the concrete as well. You will want a relatively smooth surface, but some shallow texture is good.
Let the cement cure fully, a day or two is best. Now, it is time to add color. Use paints in earth tones, or whatever you like. Make sure you use 100% latex paint. This is so the paint has fewer chemicals that might later leach into the water and harm the fish. Remember, this is not like painting a wall in your house. It is more like layering on color to give it complexity and depth. First, give the surface a basic coat, often one of the darker colors in your palette. Then, dab on lighter colors in varying patterns to add interest. Try the tips of a paint brush, a sponge, a paper towel with paint, a rag—anything you can think of, just have fun.
Let your paint cure fully, again at least a couple of days. The last step is to seal the whole thing with an epoxy resin to seal in the paint and protect it from water corrosion. Epoxy is a two-part material with a resin and a hardener. They are mixed in order to create a chemical reaction which hardens the material. A word of caution—be sure to measure the amounts of resin and hardener and follow the directions for the ratios, AND be sure to really mix the hardener into the resin before applying. The biggest source of failure for the epoxy to set up is the incorrect amount of hardener or it not being mixed evenly. It will result in your epoxy hardening in spotty patches, and some areas might not cure at all.
Give the painted concrete side a detailed covering of epoxy. Be sure to get under your ledges and in caves. Let it set up for several days. Now you are ready to put it in your aquarium. You can use silicon to tack it back to the wall, then seal around the edges with silicone caulk. It helps keep water from getting behind your rock formation.
Fill your aquarium after the caulk has fully set and circulate the water for about three days. Do a complete water change and allow it to circulate several more times. This is to help wash out any toxins that are in the paints and epoxies before you set up with fish and plants.
Now, finally, you have your own custom aquarium background. It was a bit of time, but overall should not cost your too much, and you did it yourself! Much better than something you buy.
Materials list:
Several Styrofoam sheets for base, maybe of various thicknesses
Silicone caulk
Wire brushes
Hair dryer
Knives and other tools for shaping
Ready mix Quickrete
Paint, 100% latex in a variety of colors (3-4)
Brushes, sponges, rags, paper towels, for painting
Epoxy for sealing the surface
Other posts:
Aquarium stands, options and considerations
Wall aquariums and wall-mounted aquariums
Aquarium hoods


